The Boer War Map: A Visual Narrative Of Conflict And Conquest
The Boer War Map: A Visual Narrative of Conflict and Conquest
Related Articles: The Boer War Map: A Visual Narrative of Conflict and Conquest
Introduction
In this auspicious occasion, we are delighted to delve into the intriguing topic related to The Boer War Map: A Visual Narrative of Conflict and Conquest. Let’s weave interesting information and offer fresh perspectives to the readers.
Table of Content
The Boer War Map: A Visual Narrative of Conflict and Conquest
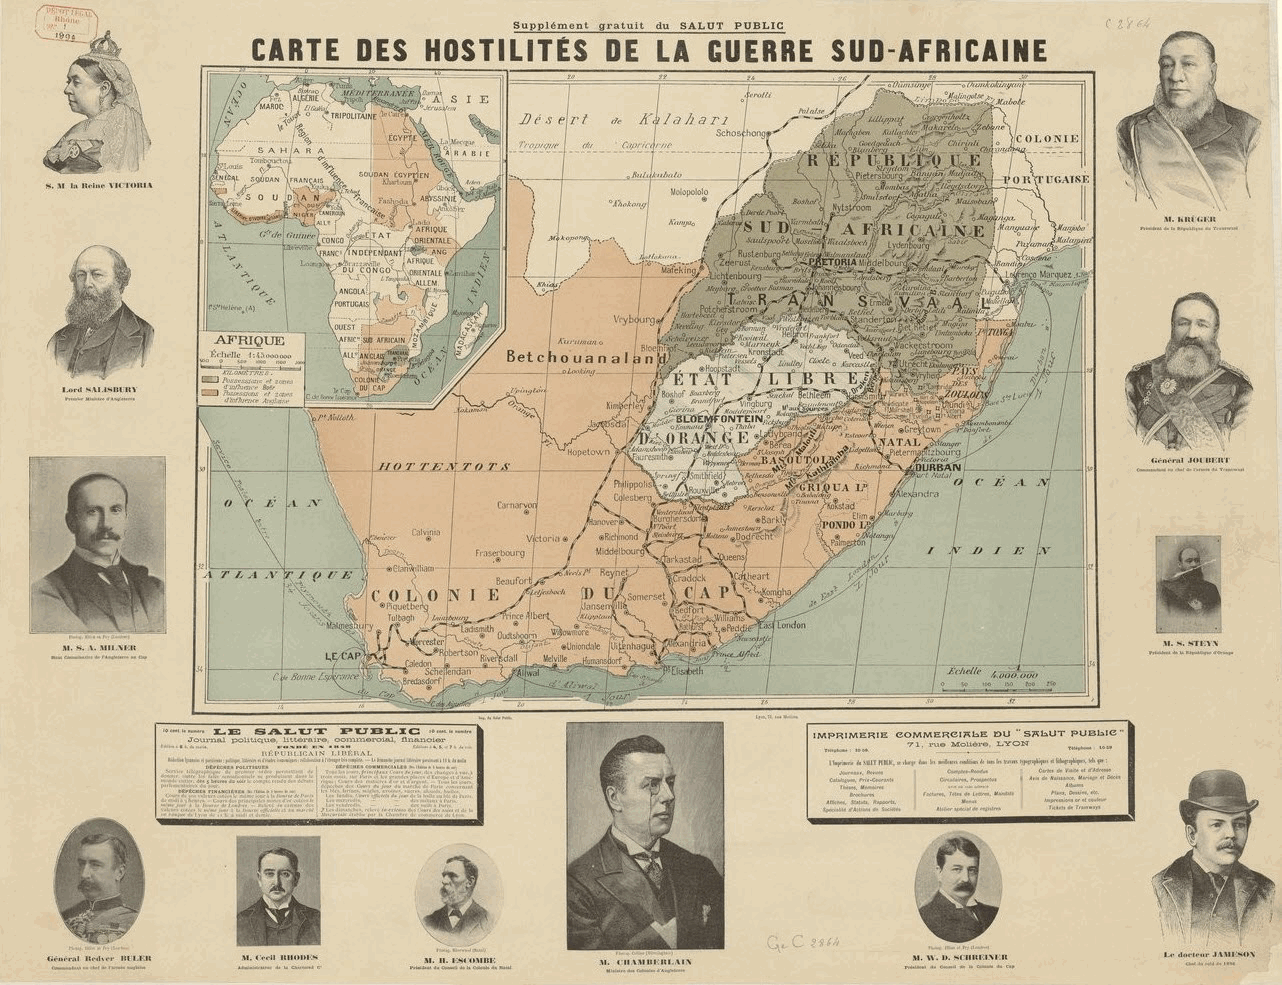
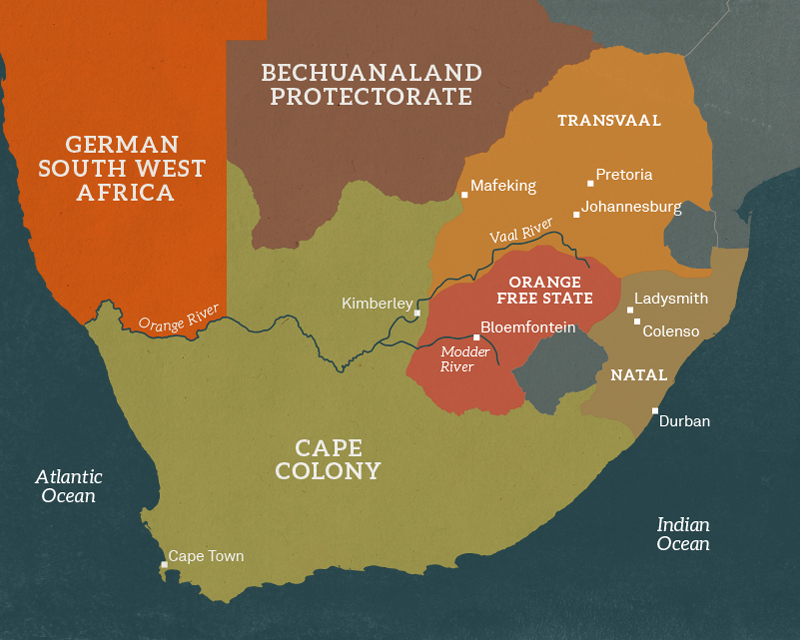
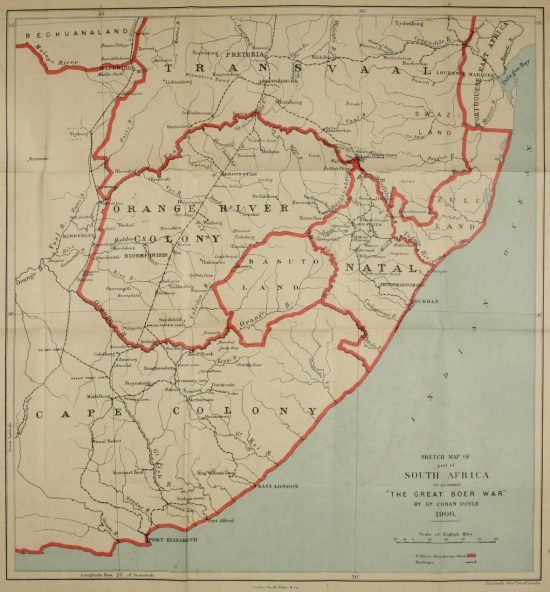
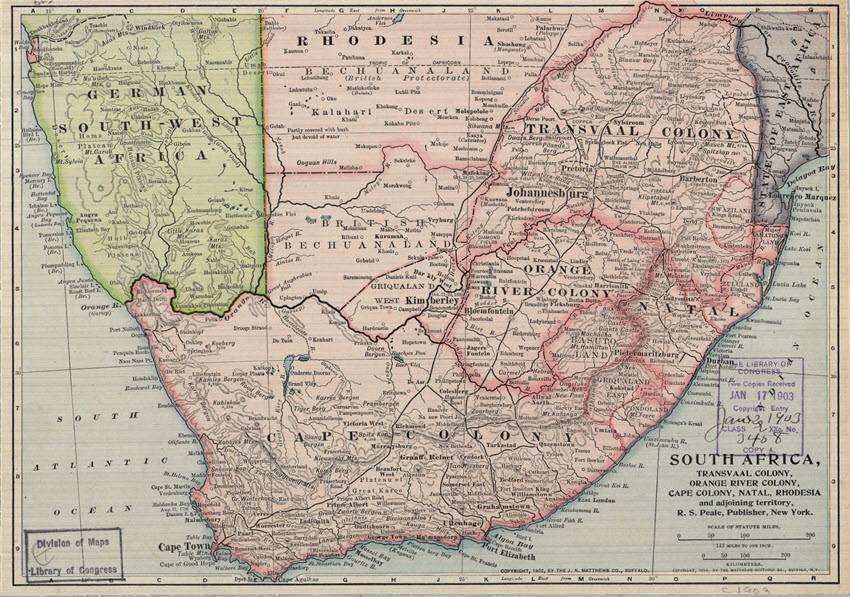
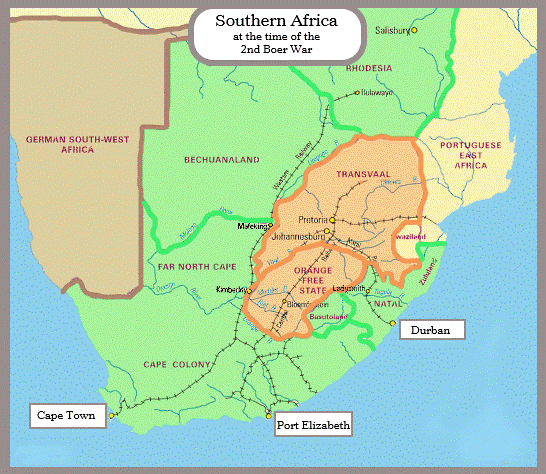
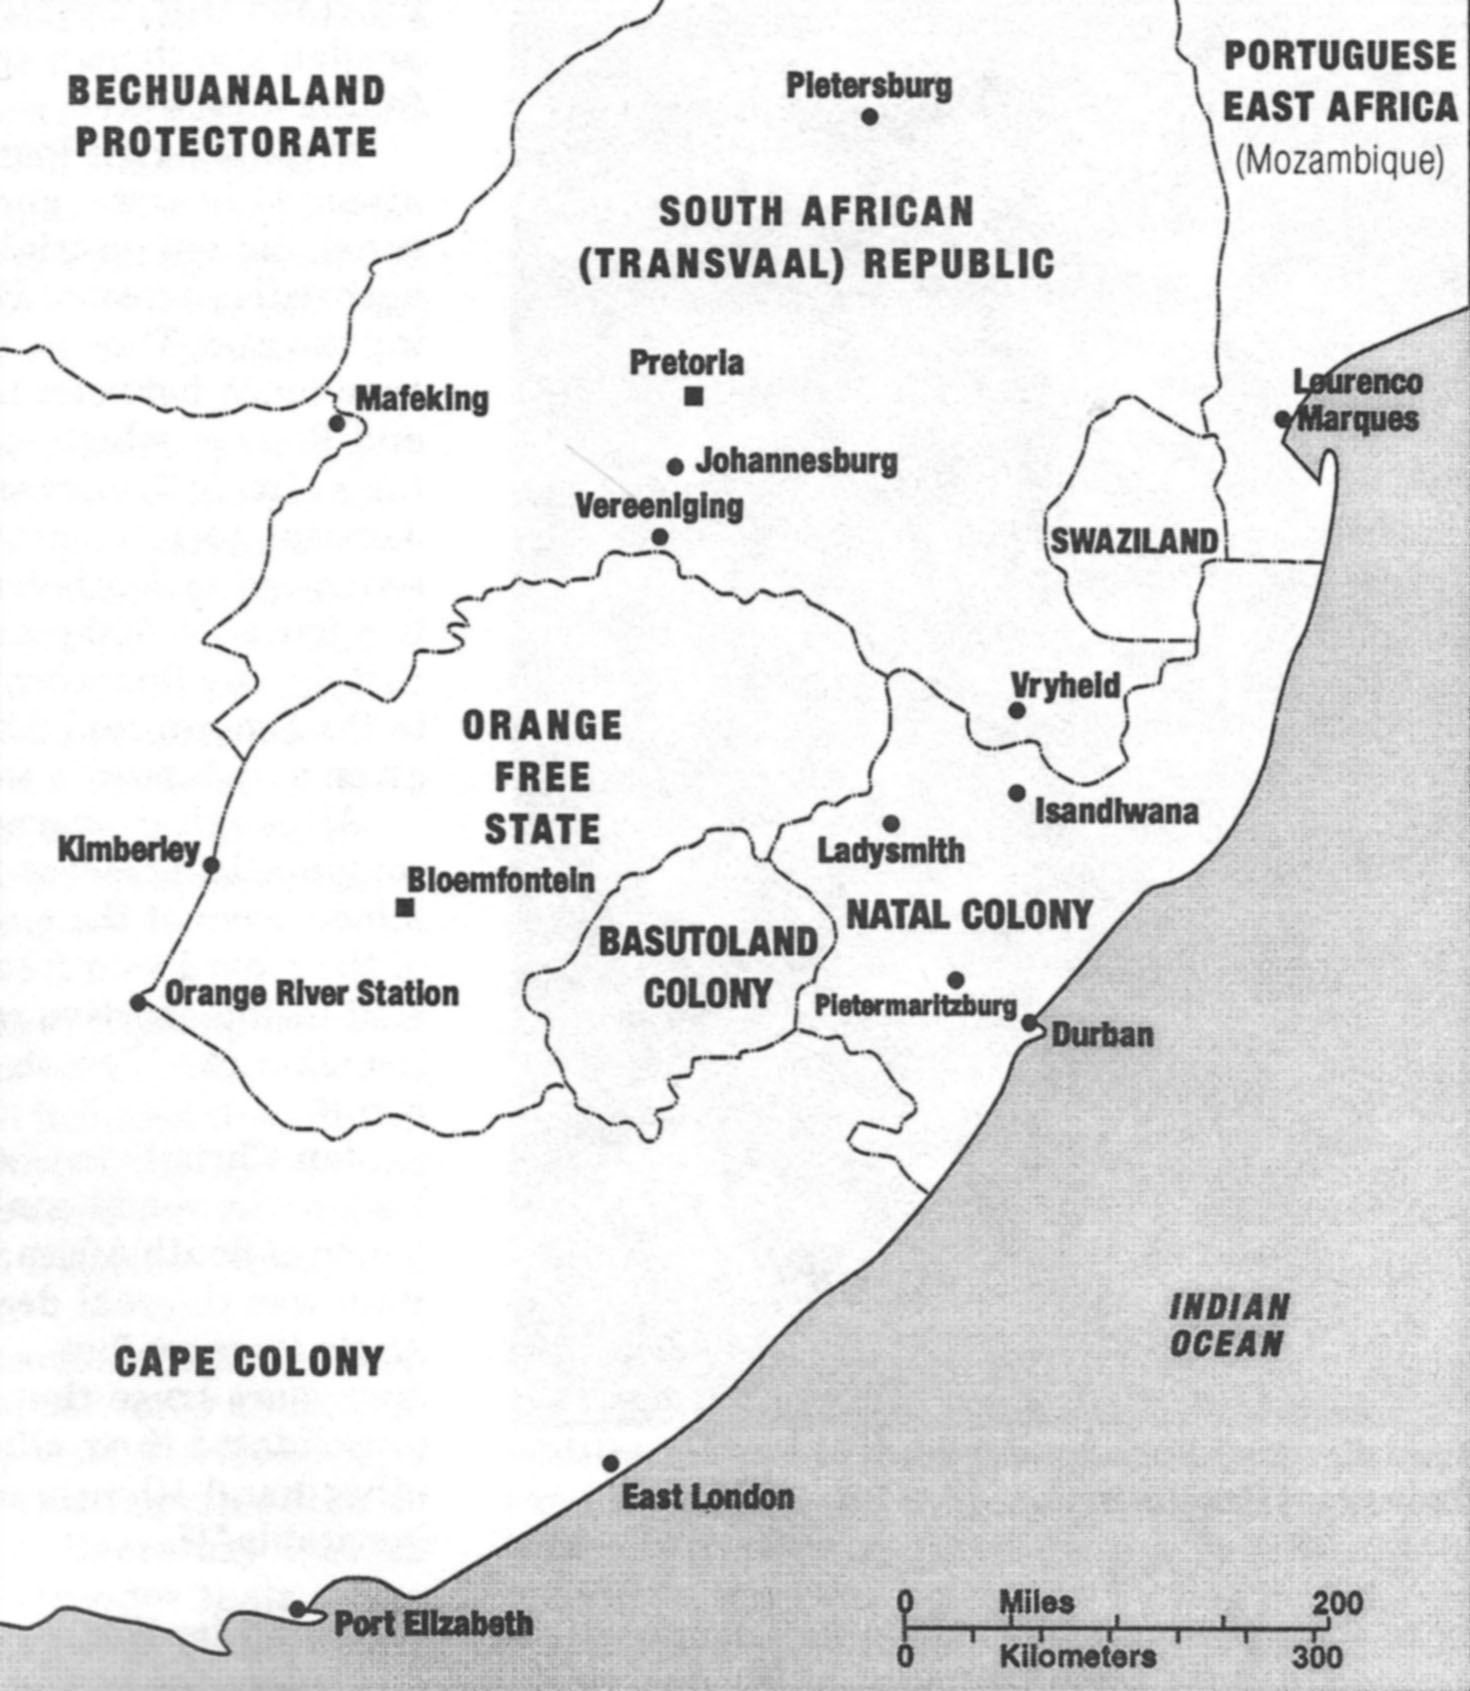
The Boer War, a conflict that raged in South Africa from 1899 to 1902, remains a pivotal event in the nation’s history. While the battles themselves are well-documented, the Boer War map provides a unique and invaluable perspective on the conflict. This cartographic representation transcends mere geographical markers; it serves as a visual narrative, offering insights into the strategic considerations, logistical challenges, and human cost of this brutal war.
Understanding the Terrain:
The map immediately reveals the geographic context of the war. The majority of the fighting took place in the Transvaal and Orange Free State, vast stretches of rolling grasslands and rugged mountains. This terrain favored the Boers, skilled marksmen who knew the landscape intimately. The British, on the other hand, faced unfamiliar territory, a significant disadvantage that impacted their initial strategies.
Strategic Importance of Key Locations:
The map highlights the importance of key locations that shaped the course of the war. The strategic town of Ladysmith, besieged for 118 days, exemplifies the crucial role of strategic chokepoints. The Battle of Spion Kop, where the British suffered heavy losses, showcases the terrain’s influence on military tactics. The map also underscores the importance of rail lines, crucial for both supply and troop movement.
The Shifting Battlefield:
The Boer War map is not static. It evolves as the conflict unfolds, reflecting the changing dynamics of the war. The initial British advance, aiming to capture key cities like Pretoria, is clearly visible. However, the map also shows how the Boers’ guerrilla tactics forced the British to adapt, leading to a protracted and brutal campaign. The shift towards a mobile warfare, with both sides engaging in raids and ambushes, is evident in the map’s depiction of scattered engagements.
A Visual Testimony to Human Cost:
Beyond the strategic considerations, the Boer War map also serves as a stark reminder of the human cost of the conflict. Concentration camps, established by the British to intern Boer civilians, are marked on the map, showcasing the devastating impact of the war on civilians. The map also highlights the numerous battlefields, each representing countless lives lost.
Understanding the Boer War through the Map:
The Boer War map offers a comprehensive understanding of the conflict by:
- Visualizing the geographical context: The map provides a clear understanding of the terrain, highlighting the advantages enjoyed by the Boers and the challenges faced by the British.
- Illustrating strategic considerations: The map showcases the importance of key locations, strategic chokepoints, and the role of transportation networks in shaping the war.
- Depicting the evolving nature of the conflict: The map demonstrates the shift from conventional warfare to guerrilla tactics, reflecting the changing dynamics of the war.
- Highlighting the human cost of war: The map serves as a stark reminder of the devastating impact of the war, including the internment of civilians and the countless lives lost.
FAQs about the Boer War Map:
Q: What types of information are typically included on a Boer War map?
A: Boer War maps typically include:
- Geographical features: Mountains, rivers, towns, and other landmarks.
- Battlefields: Locations of major and minor battles.
- Military movements: Troop deployments, advances, and retreats.
- Strategic locations: Key towns, forts, and supply depots.
- Concentration camps: Locations of camps established for Boer civilians.
- Transportation networks: Rail lines and roads.
Q: What are some of the limitations of using a Boer War map?
A:
- Limited detail: Maps often lack detailed information about specific battles or troop movements.
- Simplified representation: Maps may not accurately reflect the complexity of the conflict.
- Perspective bias: Maps may reflect the perspective of a particular side, potentially omitting important information.
Q: How can a Boer War map be used in education?
A:
- Visualizing the conflict: Maps provide a tangible representation of the war, helping students understand its geographical context.
- Analyzing strategic decisions: Students can use maps to analyze military strategies and the factors that influenced them.
- Understanding the human cost: Maps can help students appreciate the devastating impact of the war on both combatants and civilians.
Tips for Using a Boer War Map:
- Consult multiple sources: Use maps in conjunction with other primary and secondary sources to gain a more comprehensive understanding of the war.
- Focus on key locations: Identify and research the significance of important locations on the map.
- Analyze troop movements: Examine the movement of troops and the factors that influenced their decisions.
- Consider the human impact: Reflect on the human cost of the war by considering the locations of battles and concentration camps.
Conclusion:
The Boer War map stands as a powerful testament to the complexities and consequences of conflict. It offers a unique perspective on the strategic considerations, logistical challenges, and human cost of this pivotal event in South African history. By providing a visual narrative of the war, the map serves as an invaluable tool for understanding the past and drawing lessons for the future. As we engage with this historical document, we are reminded of the importance of remembering the human cost of war and striving for a more peaceful future.


Closure
Thus, we hope this article has provided valuable insights into The Boer War Map: A Visual Narrative of Conflict and Conquest. We thank you for taking the time to read this article. See you in our next article!
Leave a Reply